Manage Members and Invitations
Members is where admins manage who has access to the organization: the people in it, the invitations sent, and everyone's sign-in history.
Before You Start
You must be an admin. Members do not see this page; if they open it, Account Details opens instead. No package is needed.
Where to Find It
Sidebar: SETTINGS › ORGANIZATION SETTINGS › Members · https://platform.deepinfo.com/app/settings/org-members
+ › ADD NEW MEMBER opens it too.
Read the Screen
The page has three tabs: Members, Invited Members and Members Activity. Switching tabs does not change the page address.
Members
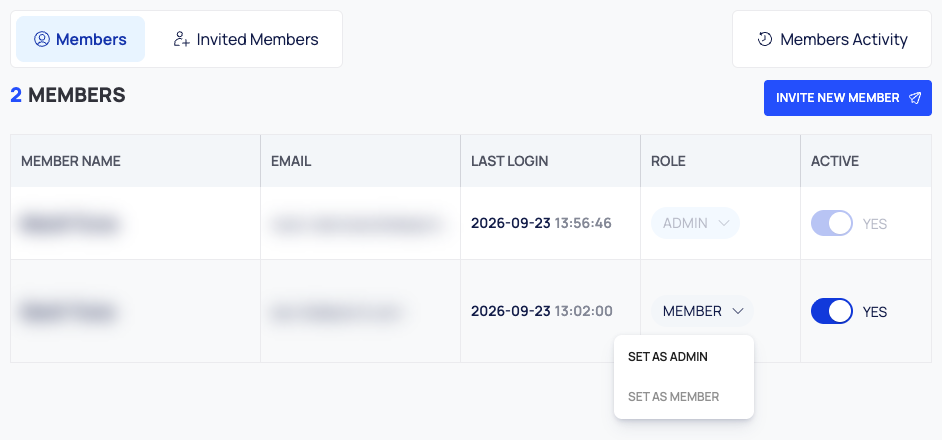
The count at the top, <n> MEMBERS, shows the number of members, with INVITE NEW MEMBER next to it.
| Column | What it shows |
|---|---|
| MEMBER NAME | First and last name |
| The member's email address | |
| LAST LOGIN | Date and time of the last sign-in |
| ROLE | ADMIN or MEMBER, with a chevron. Select it to change the role |
| ACTIVE | A switch that deactivates or reactivates the member, with YES while the member is active |
| Trash icon | Deletes the member |
Your own row has no trash icon, and its role cannot be changed.
Invited Members
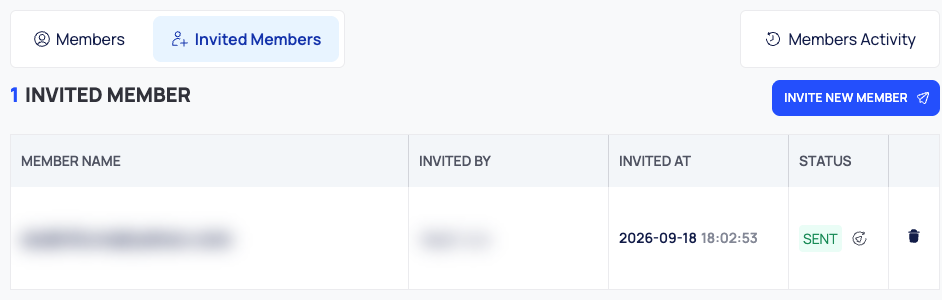
The count at the top shows the number of invitations, with INVITE NEW MEMBER next to it.
| Column | What it shows |
|---|---|
| MEMBER NAME | The email address the invitation went to |
| INVITED BY | The admin who sent it |
| INVITED AT | When it was sent |
| STATUS | SENT and RESENT in green, REVOKED in red |
A resend icon appears on invitations with the status SENT. A trash icon revokes an invitation that is not revoked yet.
Members Activity
The sign-in history of everyone in the organization. See Review member activity.
Invite People
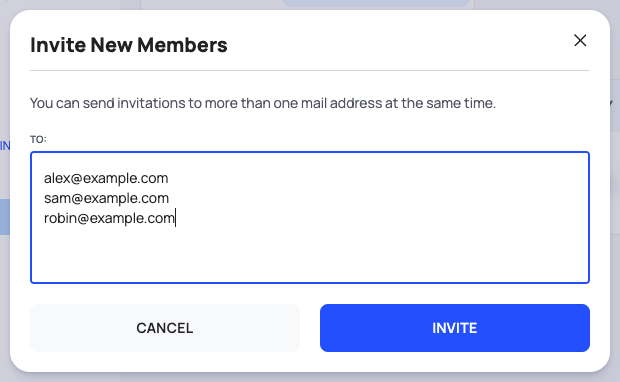
- On the Members or Invited Members tab, select INVITE NEW MEMBER. The Invite New Members window opens: "You can send invitations to more than one mail address at the same time."
- In TO:, enter the email addresses to invite, one per line. Blank lines and duplicates are removed.
- Select INVITE. The button is enabled once you have entered an address.
The platform confirms each invitation with "<email address> has been invited." and switches to Invited Members. Each person receives an email with a link to create their account; see Set up your account from an email link.
If an address is not valid, the window shows "Please enter a valid email address per line."
After inviting several addresses at once, check Invited Members to make sure every address is listed.
Change a Member's Role
- On the Members tab, select the member's ADMIN or MEMBER role button.
- Choose SET AS ADMIN or SET AS MEMBER.
- Confirm with OK.
Deactivate or Reactivate a Member
- On the Members tab, select the member's ACTIVE switch.
- Confirm with UPDATE.
Delete a Member
- On the Members tab, select the trash icon in the member's row.
- In Delete Member, select DELETE.
The platform confirms that the member has been removed.
Resend an Invitation
- On the Invited Members tab, find an invitation with the status SENT.
- Select its resend icon (Resend Email).
- In Resend Invitation, select RESEND.
Revoke an Invitation
- On the Invited Members tab, select the trash icon in the invitation's row.
- In Revoke Invitation, select REVOKE.
The status changes to REVOKED.
Review Member Activity
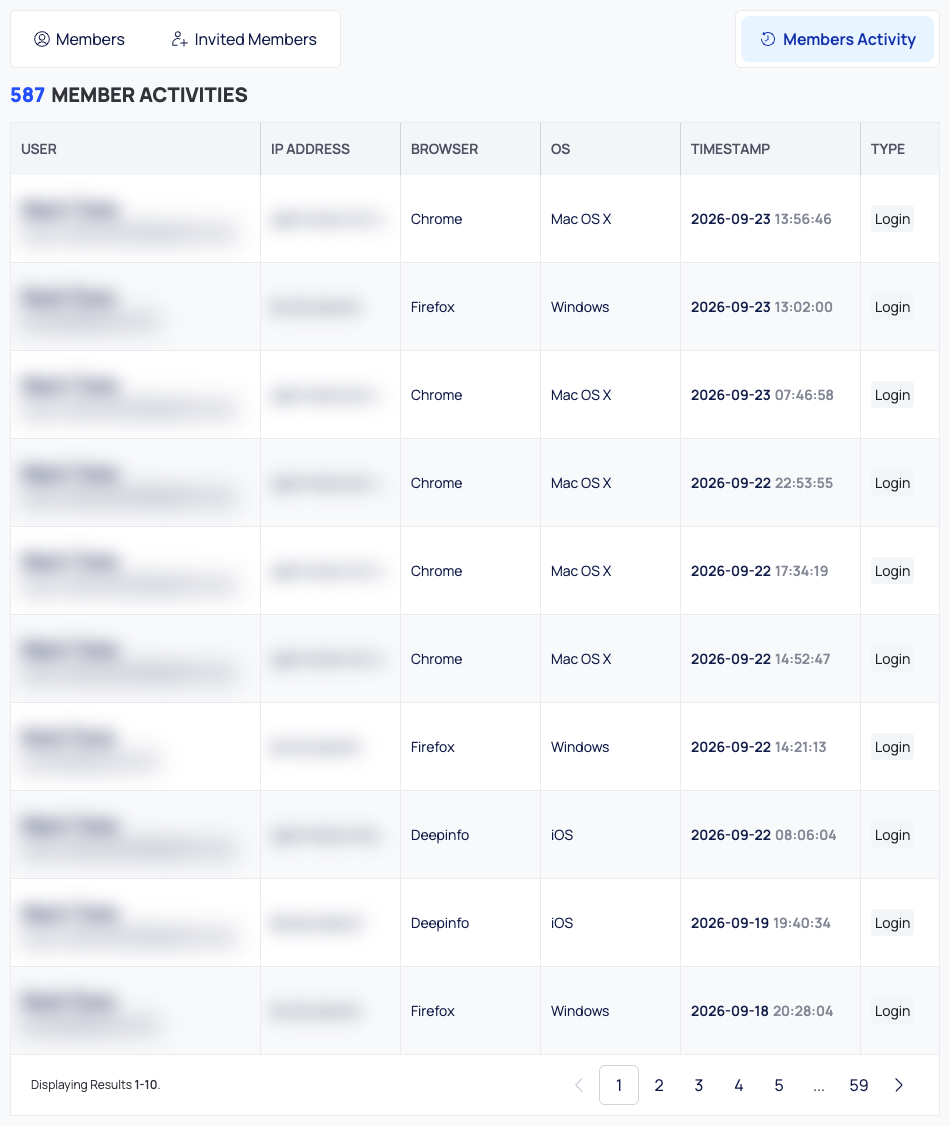
Open the Members Activity tab. It is the organization-wide version of your own Session page: one row per entry, for every member. The count at the top reads <n> MEMBER ACTIVITIES.
| Column | What it shows |
|---|---|
| USER | The member's name, with the email address below |
| IP ADDRESS | The IP address the entry came from |
| BROWSER | The browser |
| OS | The operating system |
| TIMESTAMP | When it happened |
| TYPE | The type of entry, for example Login for a sign-in |
The table shows 10 entries per page. It has no VIEW SETTINGS and no filters.
Good to Know
- Your own row is locked. You cannot change your own role, deactivate yourself or delete yourself. Ask another admin.
- No role when inviting. You cannot choose a role in the invitation. Change it on the Members tab after the person has created their account.
- No search or export. The Members and Members Activity tabs cannot be searched, filtered or exported.
- Wide table. On a laptop screen you may need to scroll the Members table sideways to reach ACTIVE and the trash icon.
- Personal data. These tabs show names, email addresses, IP addresses and sign-in times. Keep screenshots of them inside your organization.