Generate and Download a PDF Report
The platform generates a PDF report from your current data. You preview the report in the browser and then save it as a PDF. Every report you generate is kept, so you can open it again later.
Important
A report is created as soon as its page opens, with an automatic name. There is no name field and no confirmation step. GENERATE NEW REPORT opens that page straight away, except on the Asset Detail Report and Vulnerability Detail Report, which first ask you to pick an asset or a CVE. CREATE A REPORT and CREATE REPORT on an asset also open it straight away.
Before You Start
- Package: your organization's package must include Reports. See Reports.
- Role: Admin or Member.
- Data: the Asset Detail Report is for an asset in your inventory. The Vulnerability Detail Report is for a CVE found on your assets.
Where to Find It
Sidebar: REPORTS › REPORTS · Tab: EASM REPORTS · https://platform.deepinfo.com/app/platform/reports
The PDF reports are in the GENERAL REPORTS section of the EASM REPORTS tab, which opens first. For one asset, you can also start from the asset itself (see From an asset).
Read the Report Drawer
Click anywhere on a PDF report card except its button. A drawer opens on the right.
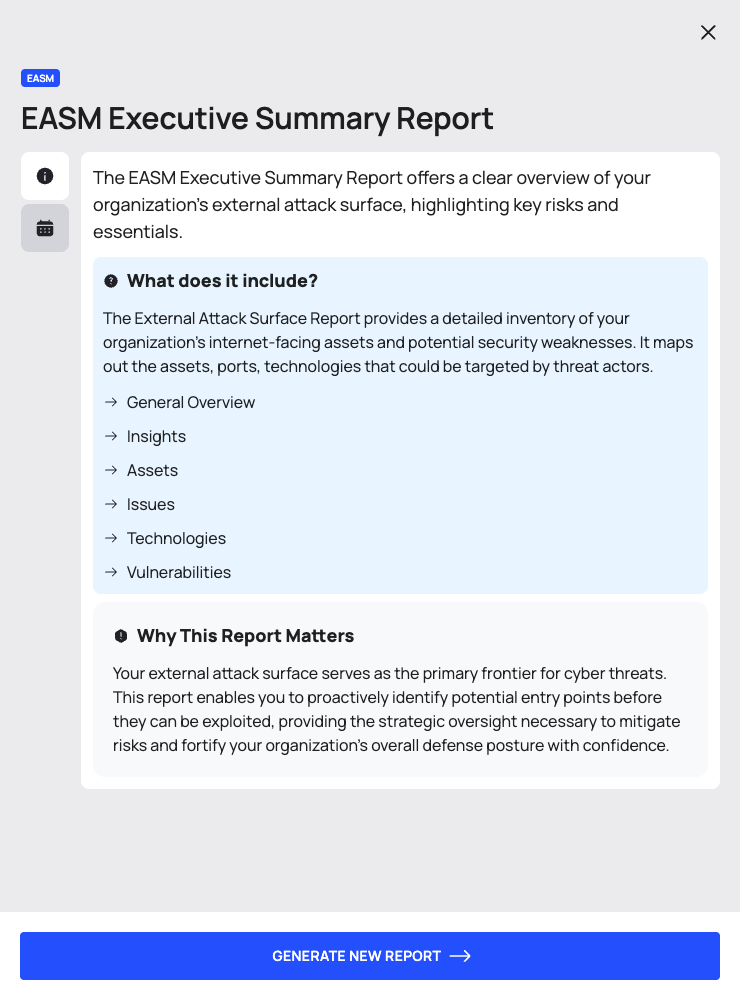
- Top: the module tag EASM, a NEW tag on some report types, and the report title.
- Two icon tabs on the left side of the drawer. Hover over an icon to see its name:
- OVERVIEW: the description, What does it include? (a summary and the list of sections) and Why This Report Matters.
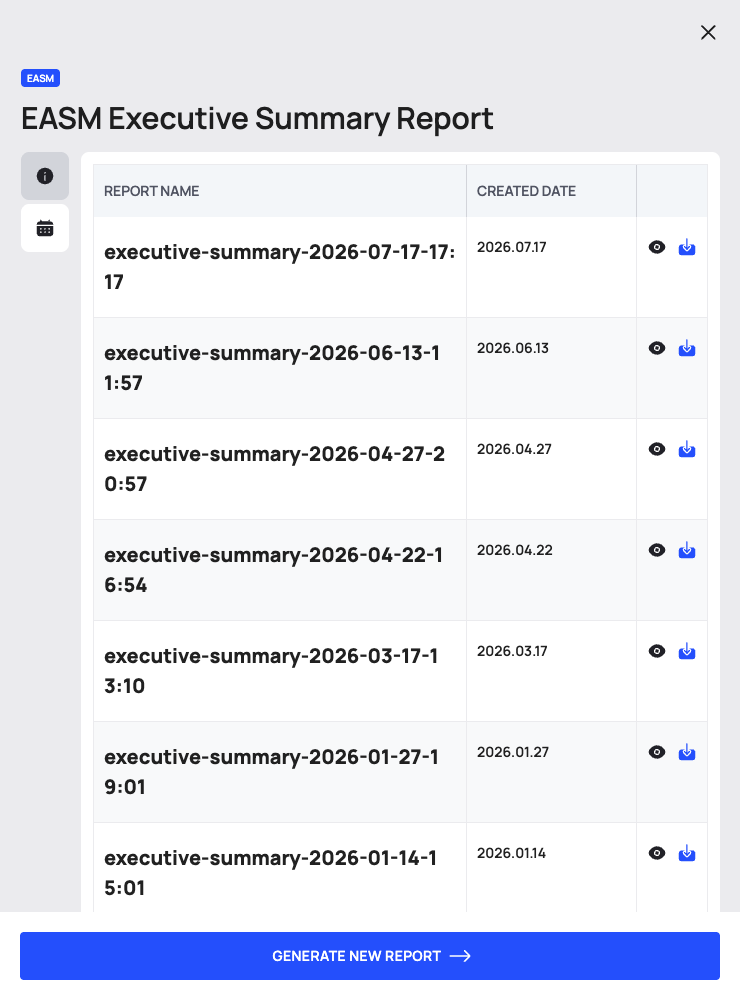
- REPORTS HISTORY: the reports of this type generated so far, newest first. The columns are REPORT NAME and CREATED DATE. Each row ends with an eye icon and a download icon. With no reports yet, the tab shows No Result Found.
- GENERATE NEW REPORT at the bottom of the drawer.
Press Esc to close the drawer.
Generate a Report for Your Organization
Use these steps for EASM Executive Summary Report, EASM Weekly Progress Report, Issue Overview Report and Vulnerability Overview Report.
- In the sidebar, select REPORTS › REPORTS. The EASM REPORTS tab opens.
- On the report's card, select GENERATE NEW REPORT. The button at the bottom of the report's drawer does the same.
- The report page opens and generation starts. The tile reads "The report is being generated..." and shows a progress bar.
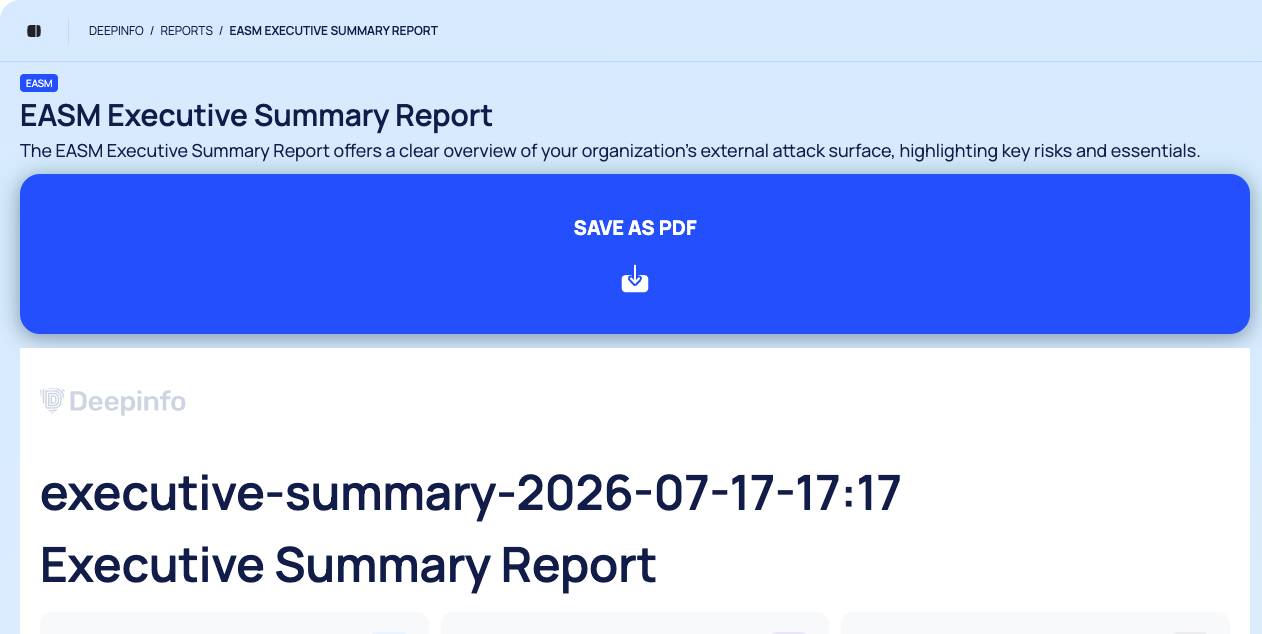
- When the report is ready, the tile turns blue and shows SAVE AS PDF. The report's pages appear below the tile, so you can read it before you download it.
- Select SAVE AS PDF. The PDF opens in a new browser tab, and the message "Your report has been generated and downloaded to your device." appears.
Generate a Report for One Asset or One CVE
The Asset Detail Report and the Vulnerability Detail Report ask what to report on first.
- On the report's card, select GENERATE NEW REPORT.
- Choose what the report is about:
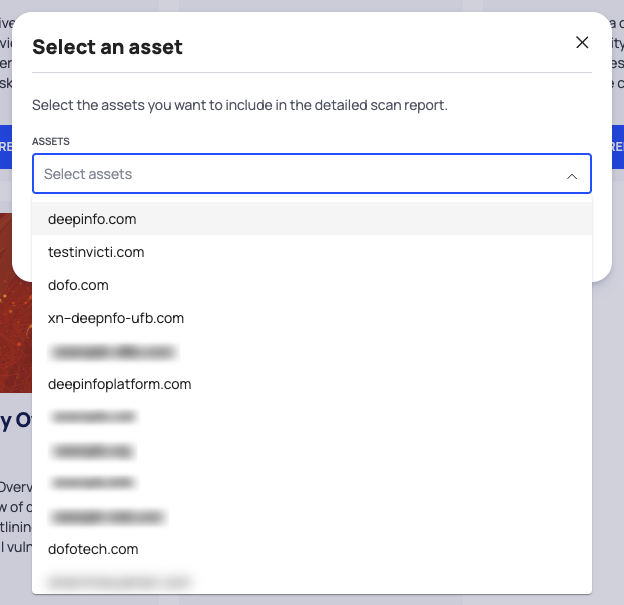
- Asset Detail Report: the Select an asset popup opens. Open ASSETS ("Select assets") and pick one asset. Type part of its name to search your whole inventory.
- Vulnerability Detail Report: the Select a CVE ID popup opens. Open CVE ID ("Select CVE") and pick one CVE.
- Select SELECT. If nothing is chosen, the popup shows "Please select an item."
- The report page opens and generation starts. Continue with steps 3 to 5 of Generate a report for your organization.
To stop, select CANCEL in the popup. No report is created.
From an Asset
- Open the asset from EXTERNAL ATTACK SURFACE MANAGEMENT › ASSETS › INVENTORY. See Investigate an asset.
- Select CREATE A REPORT at the top of the asset's page, or CREATE REPORT in the asset's … menu. The menu item opens the report in a new browser tab.
- An Asset Detail Report for that asset is generated right away. When it is ready, select SAVE AS PDF.
Reopen a Past Report
- In the sidebar, select REPORTS › REPORTS and click the body of the report's card.
- In the drawer, open the REPORTS HISTORY tab.
- Click a row. The eye icon does the same. The report opens as it was generated; it is not generated again.
- Select SAVE AS PDF to download it.
To download a past report without opening it, use the download icon on its row.
A saved report's page has no back button. Its breadcrumb reads DEEPINFO / REPORTS / followed by the report type, for example EASM EXECUTIVE SUMMARY REPORT. To return to the catalog, select REPORTS › REPORTS in the sidebar.
Good to Know
- Each opening creates a report. Every time a new-report page opens, the platform generates another report. To look at a report again, open it from REPORTS HISTORY.
- Names are automatic. A report is named after its type, or after the asset or CVE, followed by the date
and time it was created. An Executive Summary, for example, is named
executive-summary-YYYY-MM-DD-HH:mm. You cannot rename a report or add a description in the platform. - The preview leaves out the covers. The report page shows the content pages. The cover, with the report title and creation date, and the back cover are in the PDF.
- No delete in the platform. Deleting a report is available through the API only (see below).
- To receive a report regularly, schedule it instead of generating it by hand. See Schedule a report.
Do This With the API
- Create a report
- Search generated reports, for example all reports of one type
- Get one report
- Get a download link for a report's PDF
Available through the API only: