Schedule a Report
A scheduled report generates one type of PDF report on a regular basis, daily, weekly or monthly, and emails it to the members you choose. You set up and remove schedules on the Scheduled Reports screen.
Before You Start
- Package: your organization's package must include Reports. See Reports.
- Role: Admin or Member. Admins can send a schedule to any member of the organization; a member can choose only themselves as the recipient.
- Recipients: reports are emailed to members of your organization. To add people first, see Manage members and invitations.
Where to Find It
Sidebar: REPORTS › SCHEDULED REPORTS · https://platform.deepinfo.com/app/platform/scheduled-reports
Read the Screen
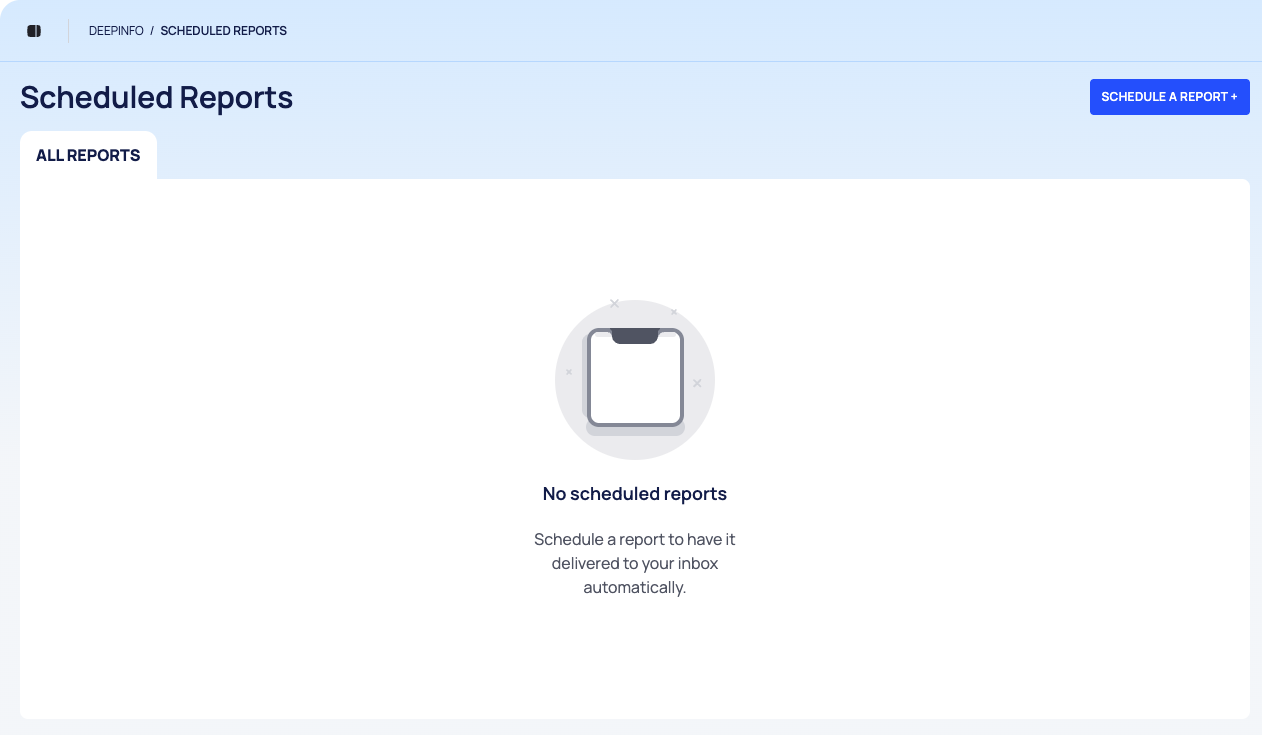
- Breadcrumb and title: DEEPINFO / SCHEDULED REPORTS and Scheduled Reports.
- SCHEDULE A REPORT: opens the popup that creates a schedule.
- ALL REPORTS tab: your schedules, one card each. A card shows "Scheduled for:" and "Last Sent Date:".
When there are no schedules yet, the screen shows No scheduled reports and "Schedule a report to have it delivered to your inbox automatically."
Schedule a Report
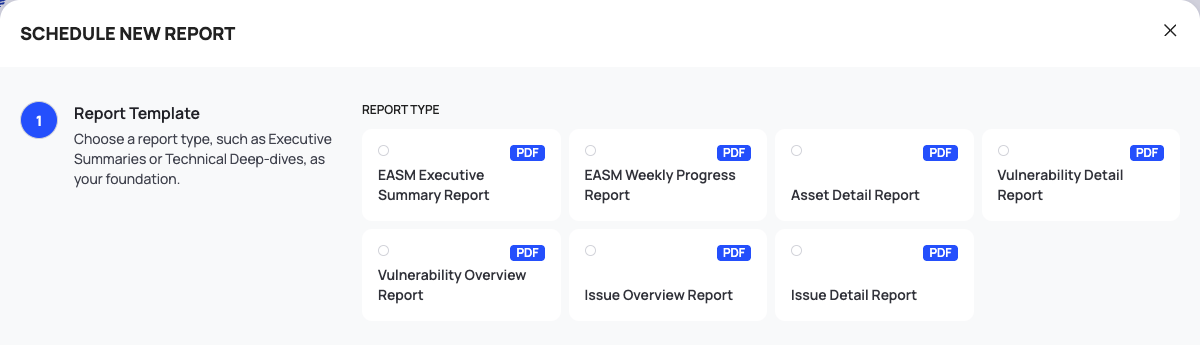
- Select SCHEDULE A REPORT. The SCHEDULE NEW REPORT popup opens. It has two steps.
- Report Template: under REPORT TYPE, select the report to send. Every template is a PDF report:
- EASM Executive Summary Report
- EASM Weekly Progress Report
- Asset Detail Report
- Vulnerability Detail Report
- Vulnerability Overview Report
- Issue Overview Report
- Issue Detail Report
- If you chose a report about one item, an extra field appears. Pick the item there:
- Asset Detail Report: ASSET ("Select asset").
- Vulnerability Detail Report: CVE ID ("Select CVE").
- Issue Detail Report: ISSUE ("Select issue").
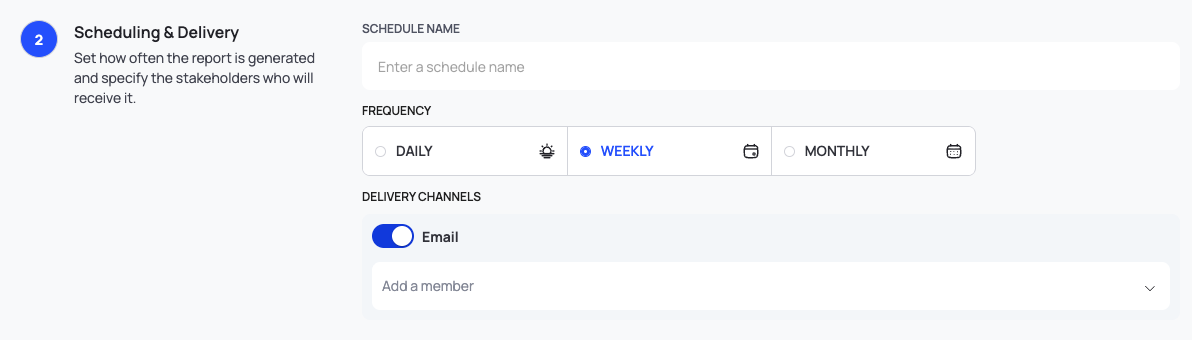
- Scheduling & Delivery:
- Enter a SCHEDULE NAME.
- Under FREQUENCY, choose DAILY, WEEKLY or MONTHLY.
- Under DELIVERY CHANNELS, Email is switched on. In the Add a member box, choose the members who should receive the report. You can choose more than one.
- Select SCHEDULE REPORT. The schedule appears in the list.
To close the popup without saving, press Esc.
See a Schedule's Details
Click a schedule's card. A drawer opens on the right with two tabs, Overview and History. Overview shows Frequency, Members (the recipients), Next Send Date and Last Sent Date.
Remove a Schedule
- Open the schedule's drawer.
- Select DELETE.
- In the Remove Scheduled Report dialog, select REMOVE.
The report stops being sent.
Change a Schedule
A schedule cannot be edited. To change its report, frequency or recipients, remove it and schedule the report again with the new settings.
Good to Know
- Only PDF reports can be scheduled. The CSV and JSON exports cannot be sent on a schedule. See Export all data as CSV or JSON.
- Issue Detail Report is available only here. It covers one issue you choose, and it is not in the catalog on REPORTS › REPORTS.
- You cannot choose the hour or the day. There is no control for the time of day or the day of the week. A schedule's drawer shows its Next Send Date.
- Email is the only delivery channel.
- Each run generates a new report. Every time a schedule is due, the platform generates the report and emails it. To generate a report yourself at any time, see Generate and download a PDF report.
Do This With the API
- List scheduled reports
- Get one scheduled report, with its last and next send dates
- Create a scheduled report
- Delete a scheduled report