Manage Notification Rules
All notification rules are listed on the Notification Rules screen. From there you can see what each rule does, switch rules on and off, and change or remove them.
Before You Start
- Package: your organization's package must include Notifications. See Notification Center.
- Role: Admin or Member.
- Data: at least one rule. To create one, see Create a notification rule.
Where to Find It
Sidebar: NOTIFICATION CENTER · https://platform.deepinfo.com/app/platform/notification/rules
Read the Screen
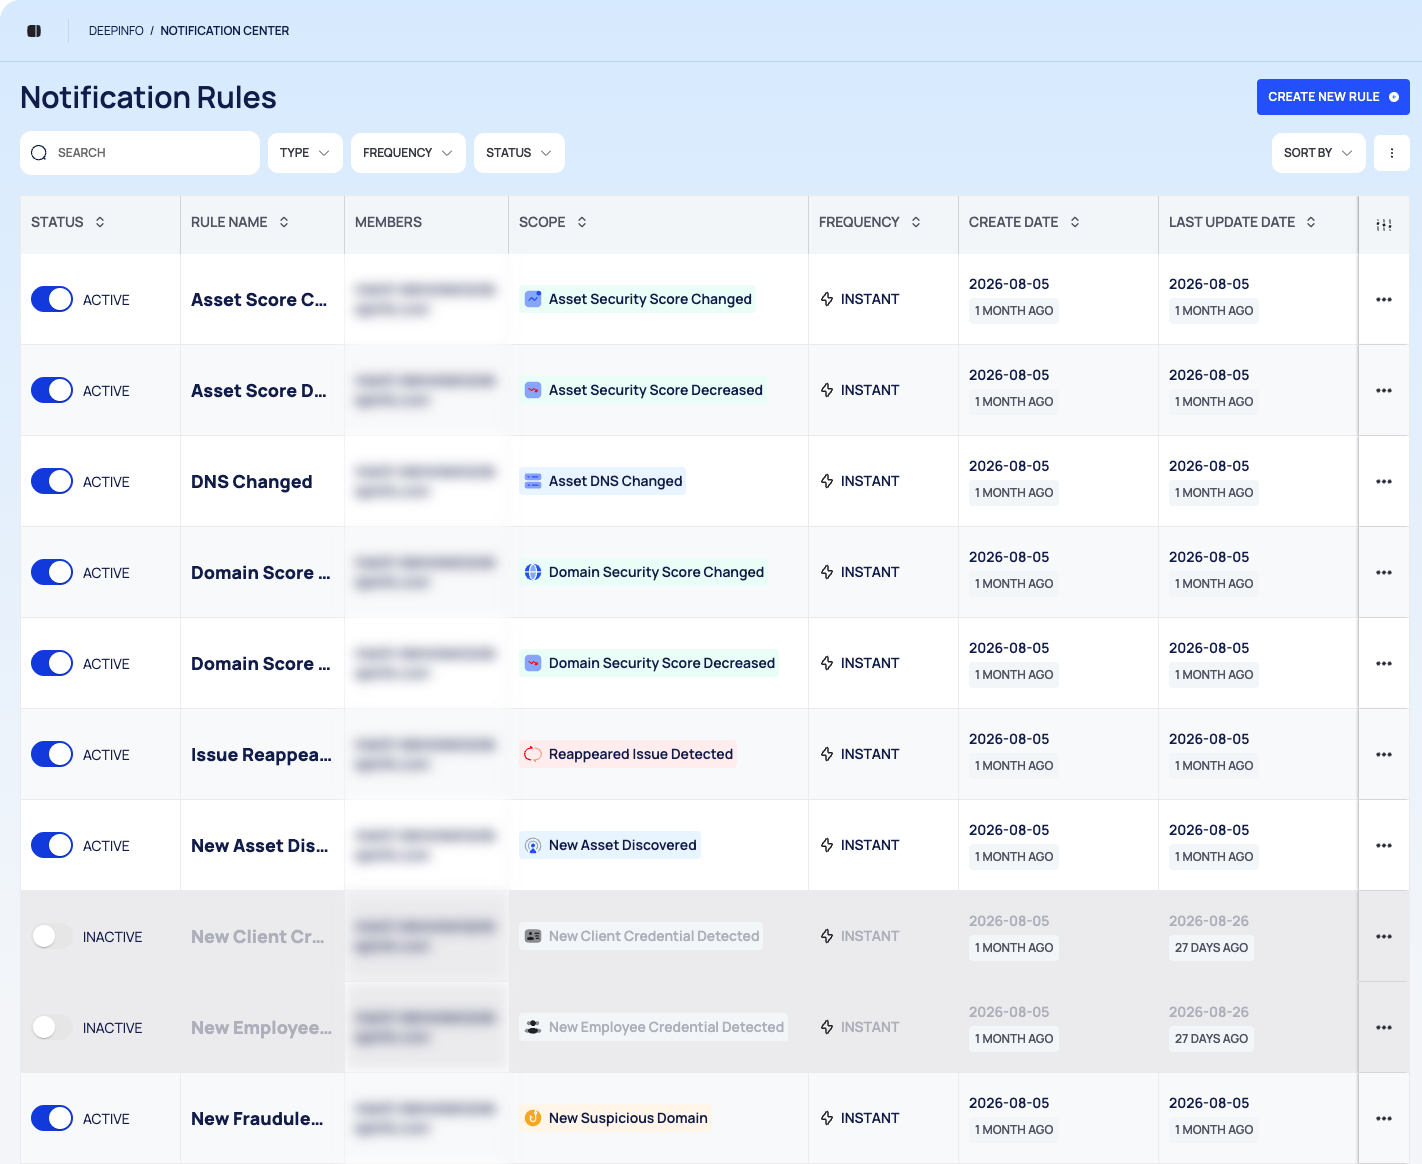
Notification Rules and the CREATE NEW RULE button.
Filter bar:
- SEARCH: type part of a rule name and press Enter.
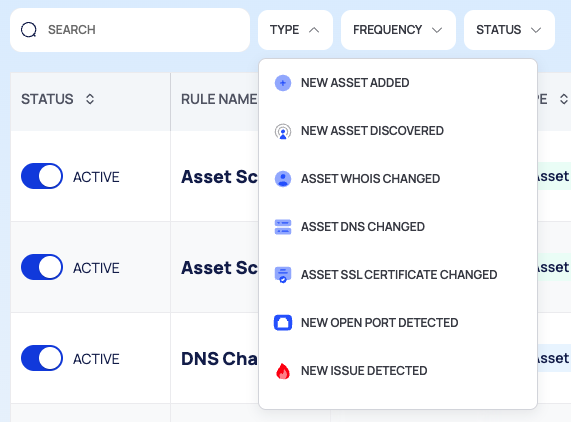
- TYPE: show the rules for an event. The list has every event, in capitals.
- FREQUENCY: INSTANT, DAILY or WEEKLY.
- STATUS: ACTIVE or INACTIVE.
- SORT BY: see Sort the list.
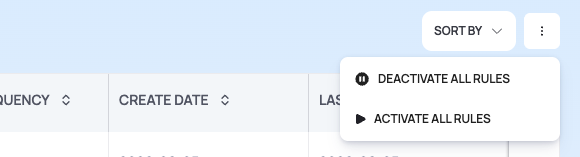
- ⋮: DEACTIVATE ALL RULES and ACTIVATE ALL RULES.
Table:
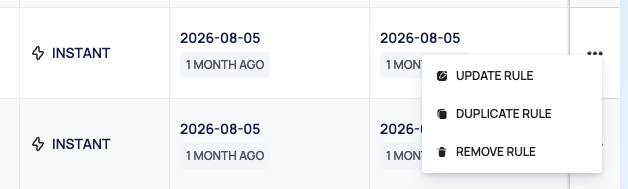
Column Shows STATUS An ACTIVE / INACTIVE switch. Inactive rows are grayed out. RULE NAME The rule's name MEMBERS The recipients' email addresses SCOPE The event, as a colored chip, for example Reappeared Issue Detected FREQUENCY How often the rule sends, for example INSTANT CREATE DATE When the rule was created, with how long ago below the date LAST UPDATE DATE When the rule last changed, with how long ago below the date (last column) The row menu: UPDATE RULE, DUPLICATE RULE, REMOVE RULE
The icon in the header of the last column opens View Options:
- Result Per Page: 25, 50, 75 or 100 rows. The default is 25.
- Reset to Default View.
- SHOWN: a switch for each column, to hide or show it.
Sort the List
- Click a column header to sort by that column. Every column sorts except MEMBERS.
- SORT BY opens a popover. Choose a field (Rule Name, Scope, Active, Frequency, Create Date or Last Update Date), then a direction (Ascending or Descending), and select APPLY. The button then shows the field and the direction, ASC or DESC. CLEAR clears the choice.
Note
SORT BY › Create Date may not reorder the list, even though the button shows the choice. To sort by creation date, click the CREATE DATE column header instead.
See a Rule's Settings
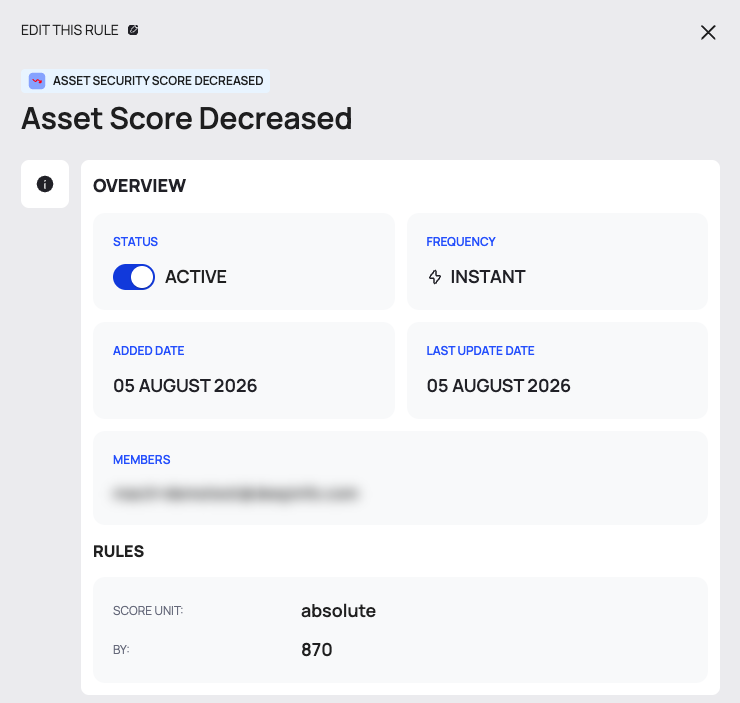
Click a rule's row. A drawer opens on the right with:
- EDIT THIS RULE, the event chip, for example NEW ISSUE DETECTED, and the rule name;
- OVERVIEW: STATUS (a switch that works like the one in the list), FREQUENCY, ADDED DATE, LAST UPDATE DATE and MEMBERS, the recipients;
- RULES: every filter of the rule, as a label and a value. A rule without filters shows -. See Events and filters.
Activate or Deactivate a Rule
- In the rule's row, click the STATUS switch. You can also use STATUS in the rule's drawer.
- In the Confirmation dialog, select UPDATE.
An inactive rule is kept with all its settings but sends no emails.
Activate or Deactivate Many Rules
- Filter the list so that it shows the rules you want to change. If needed, raise Result Per Page so they all fit on one page.
- Open the ⋮ menu in the filter bar and select ACTIVATE ALL RULES or DEACTIVATE ALL RULES.
- The Confirmation dialog asks you to confirm the change for all rules in the current results. Select ACTIVE to activate them, or DEACTIVE to deactivate them.
Only the rules on the current page change. Each menu item is unavailable when the list is empty or when every rule shown already has that status.
Edit a Rule's Name or Recipients
- In the rule's row, open the row menu and select UPDATE RULE. In the drawer, EDIT THIS RULE does the same.
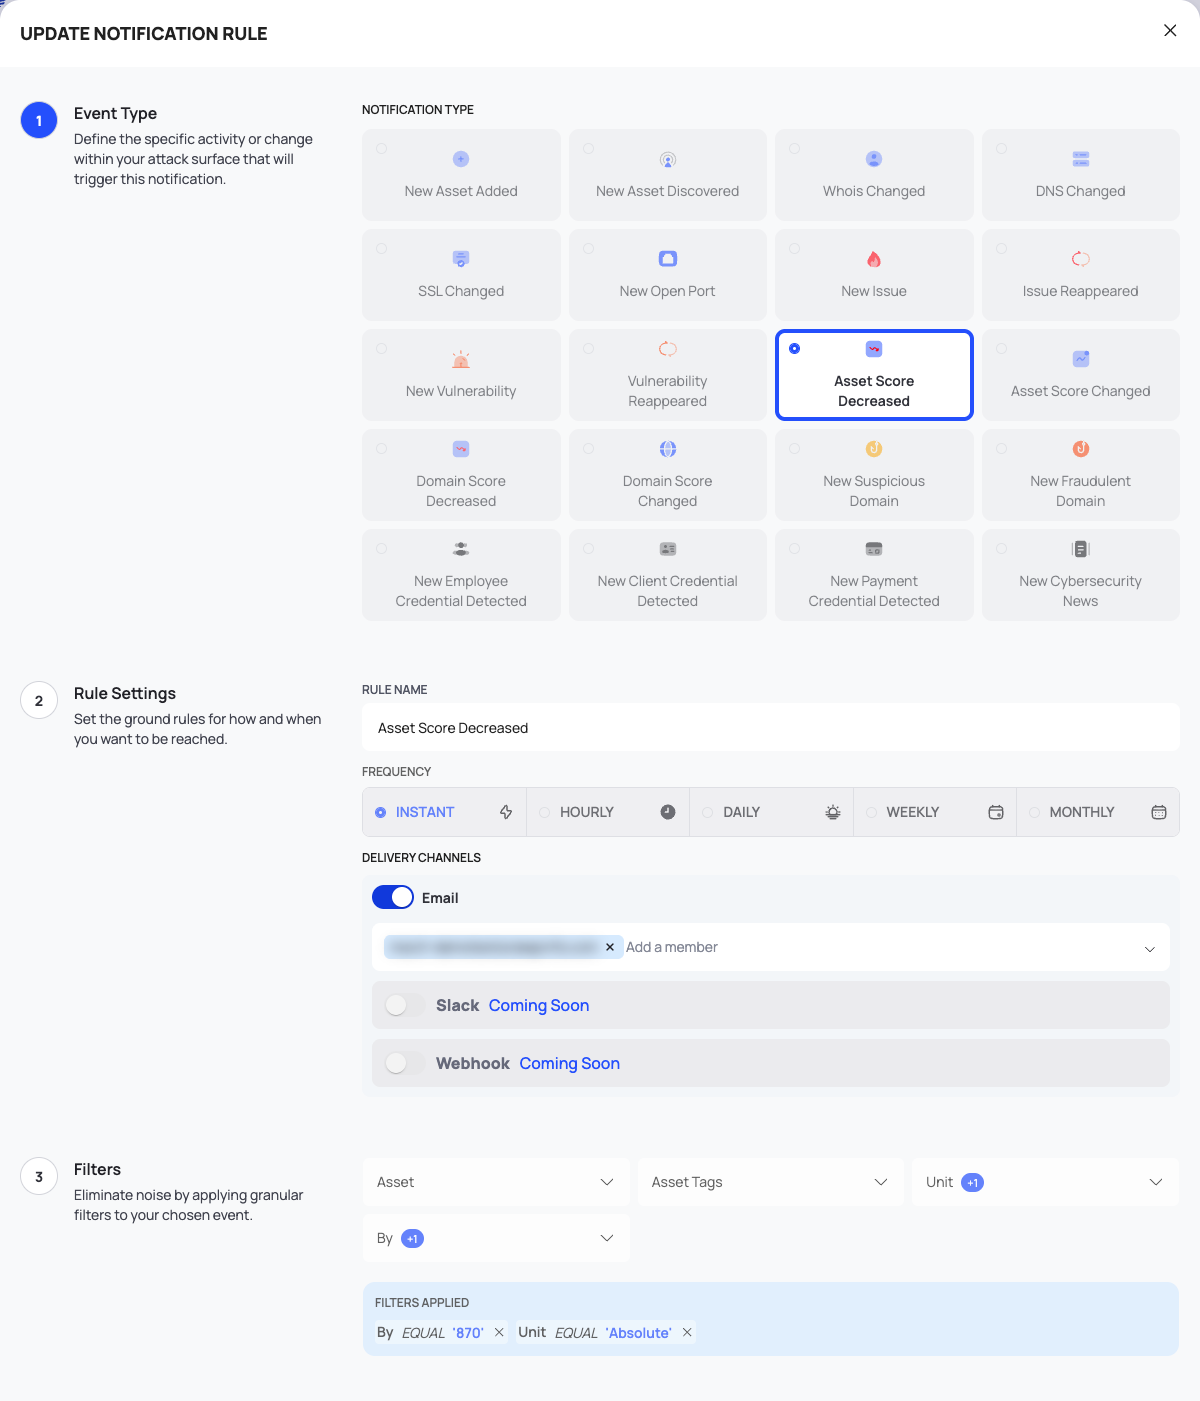
- The UPDATE NOTIFICATION RULE popup opens. Change the RULE NAME, or add and remove recipients in Add a member. The rule needs at least one member.
- Select UPDATE.
The event, the frequency and the filters are read-only in this popup. They cannot be changed.
Change a Rule's Event, Frequency or Filters
A saved rule keeps its event, frequency and filters. To change them, make a new rule from the old one:
- In the rule's row, open the row menu and select DUPLICATE RULE.
- The CREATE NEW NOTIFICATION RULE popup opens with the rule's settings filled in. The name starts
with
NEW -. - Change the event, frequency or filters, and the name if you like.
- Select CREATE RULE.
- Remove the old rule (below).
Remove a Rule
- In the rule's row, open the row menu and select REMOVE RULE.
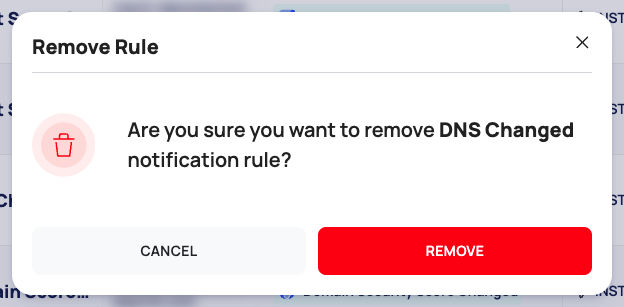
- The Remove Rule dialog asks whether to remove the rule. Select REMOVE.
Good to Know
- Bulk changes stop at the page. ACTIVATE ALL RULES and DEACTIVATE ALL RULES change only the rules on the page you are looking at.
- Deactivate instead of removing if you may need the rule again: an inactive rule keeps its settings.
- The FREQUENCY filter has no HOURLY or MONTHLY. To find those rules, sort the list by the FREQUENCY column.
- Recipients are listed in two places: the MEMBERS column and the MEMBERS block in the rule's drawer.