Search, Filter and Export Lists
Most module screens are lists: assets, discovered assets, issues, vulnerabilities, technologies, compromised employees and exposed credentials, suspicious and fraudulent domains, and Deep Search & Insights (DSI) search results. They share the same controls, described once here.
Before You Start
You need the module's package. Some lists do not offer every control; each module page says which ones it has.
Where to Find It
On any list screen, for example the asset inventory: Sidebar: EXTERNAL ATTACK SURFACE MANAGEMENT › ASSETS › INVENTORY · Tab: ASSETS LIST · https://platform.deepinfo.com/app/easm/assets
Read a List Screen
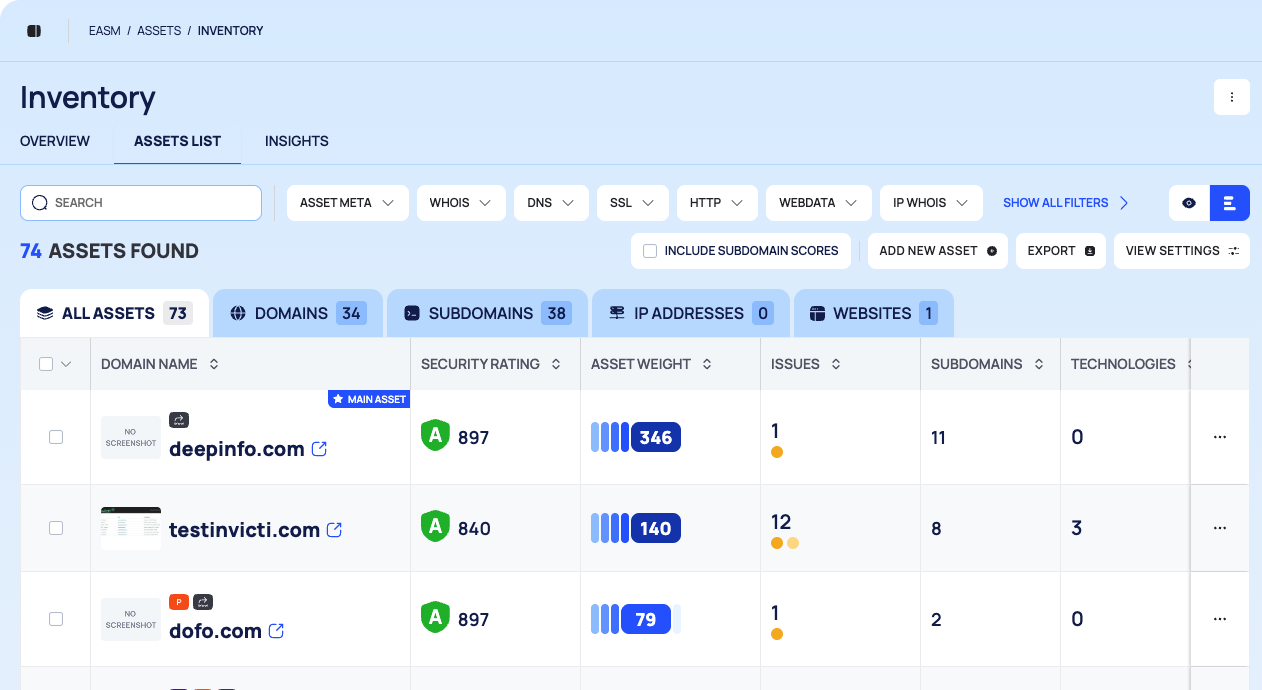
From top to bottom, a list screen usually has:
- In-page tabs under the page title, for example OVERVIEW, ASSETS LIST and INSIGHTS. The list is one of these tabs.
- The filter bar: the SEARCH box, one filter chip per category or field, and at the right two icons that switch between quick view and list view. When the chips do not fit, SHOW ALL FILTERS shows the rest and HIDE FILTERS folds them again.
- The result line: the number of results, for example <n> ASSETS FOUND, and buttons such as EXPORT and VIEW SETTINGS. Some lists add options here, such as SHOW INACTIVES.
- List tabs, on some lists, for example one tab per asset type with its count.
- The list itself, with "Displaying Results" and the page numbers below it.
Search a List
- Type in the SEARCH box.
- Press Enter.
The search is added as a filter on the list's main field. In the inventory, for example, it becomes the condition Asset · Must · Contains Any · your text.
On DARK WEB SEARCH, Enter only adds your text as a condition. Select SEARCH to run the search.
Filter a List
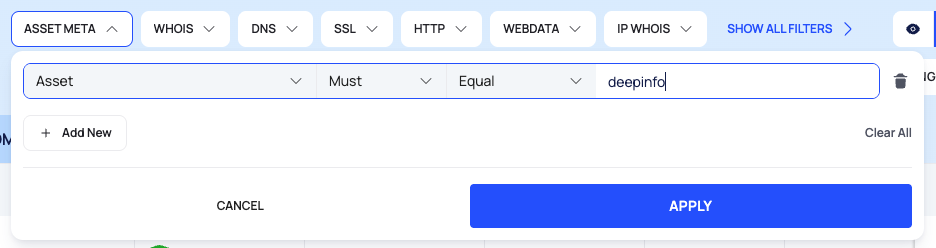
- Select a filter chip. If the one you need is not shown, select SHOW ALL FILTERS first.
- On some lists a chip is a category. The inventory, for example, has ASSET META, WHOIS, DNS, SSL, HTTP, WEBDATA, IP WHOIS and OTHER. Under Select field, choose the field to filter on.
- On other lists a chip is a single field, for example ISSUE, SEVERITY or STATE in the issue list.
- Set the rule:
- Must: results must match this condition.
- Must Not: results must not match this condition.
- Should: results must match at least one of your Should conditions.
- Choose an operator and enter the Value. The operators depend on the field:
- text fields offer operators such as Equal, Wildcard, Fuzzy, Contains Any, Start With and Exists;
- number fields use Between, with a MINIMUM and a MAXIMUM;
- date fields use AFTER and BEFORE;
- some fields have one fixed operator, for example Equal.
- To add another condition in the same chip, select Add New. Clear All removes the chip's conditions.
- Select APPLY, or CANCEL to close without changes.
The chip then shows how many conditions it holds, for example ASSET META 1.
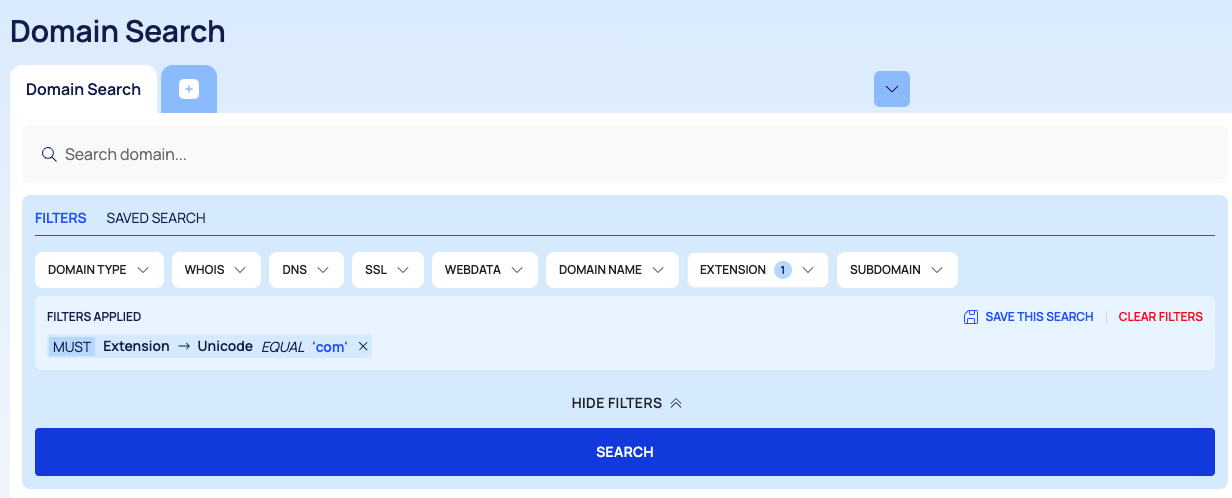
Some search pages work a little differently: DOMAIN SEARCH and VULNERABILITY SEARCH in DSI, DARK WEB SEARCH and CYBER SECURITY NEWS. On these pages the filters sit in a panel, and you run the search with SEARCH. Your conditions are listed under FILTERS APPLIED, and CLEAR FILTERS removes them all. On the DSI search pages and DARK WEB SEARCH, the panel has the tabs FILTERS and SAVED SEARCH.
Switch Between Quick View and List View
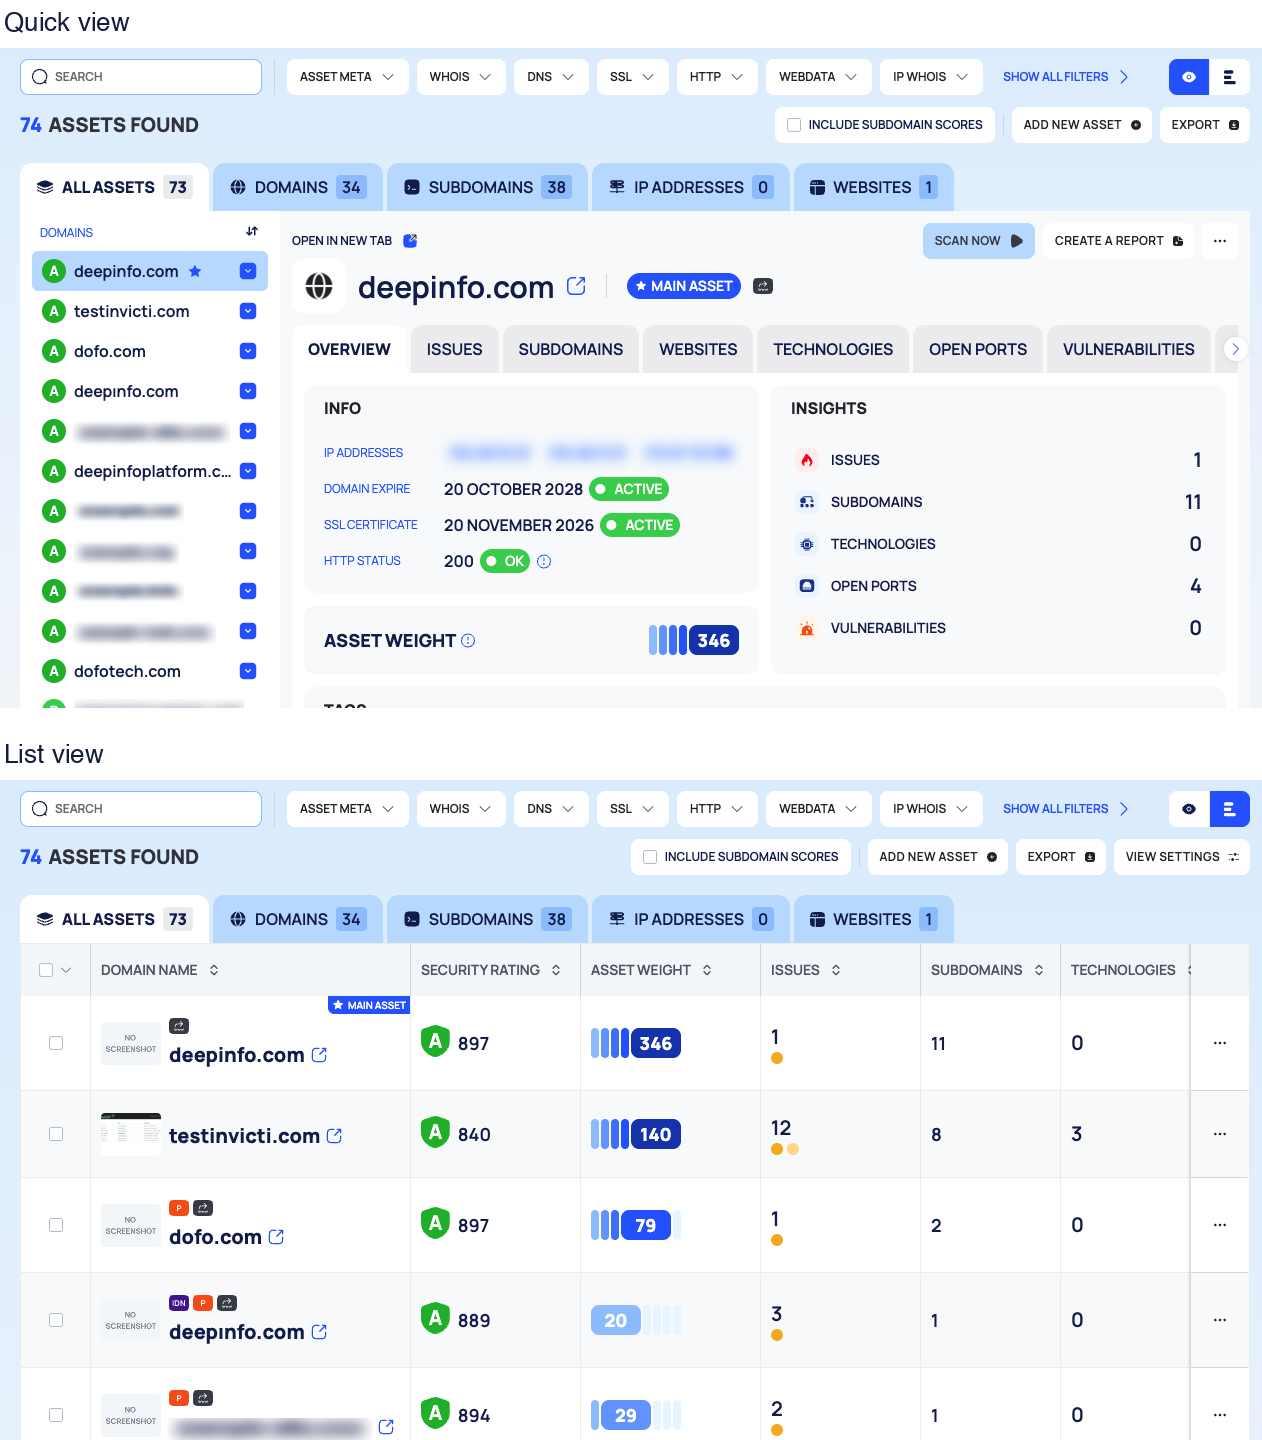
The two icons at the right of the filter bar switch the layout. The eye icon is quick view.
- List view shows a table, usually 25 results per page.
- Quick view shows a list on the left and the selected record's details on the right, with OPEN IN NEW TAB to open the record's full page. On many lists, LOAD MORE at the end of the left list loads more records. The inventory's left list has its own SEARCH box and a sort icon.
Some controls, such as VIEW SETTINGS, are hidden in quick view.
Change Columns, Sorting and Page Size
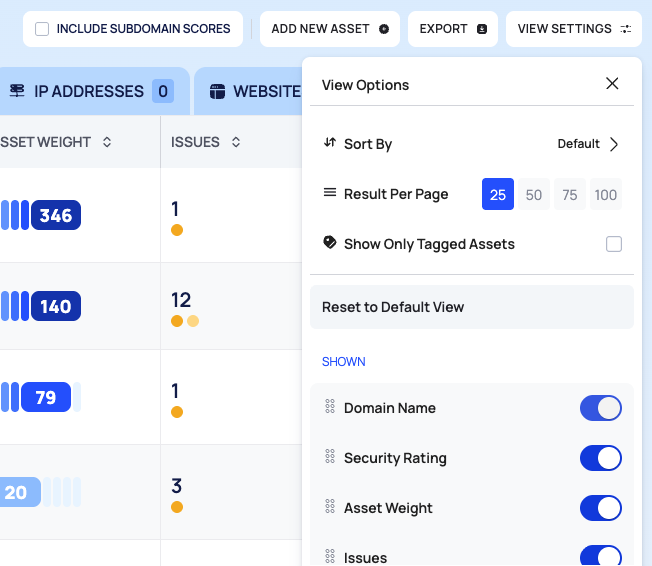
In list view, select VIEW SETTINGS to open View Options. Depending on the list, it has:
- Sort By: shows Default until you choose. Select it, choose the field and the direction in the two Select boxes, and select APPLY. CLEAR removes the sort.
- Result Per Page: 25, 50, 75 or 100.
- SHOWN: one switch per column. Turn a switch off to hide the column. Drag columns to change their order. A column whose switch cannot be changed is always shown.
- Reset to Default View: restores the default columns.
- Extra options on some lists, for example Show Only Tagged Assets in the inventory.
To sort by a column, select the arrows in its header. The first click sorts in descending order, the second in ascending order, and the third returns to the default order. Not every column can be sorted.
Column changes are not saved: when you reload the page, the default columns come back. Your search and filters are cleared on reload too, and on some lists when you switch list tabs.
Open a Record
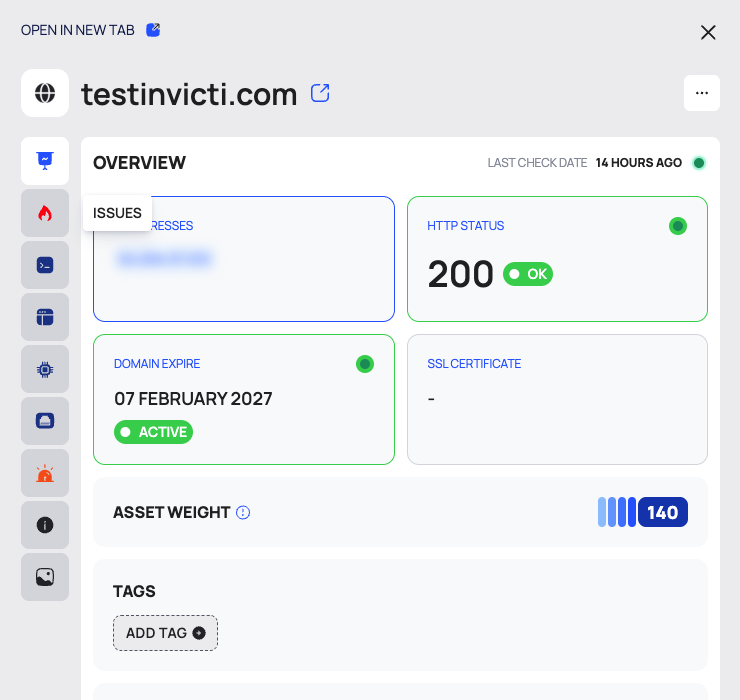
Select a row to open its drawer, a panel on the right with the record's details.
- The drawer's sections are a column of icons along its side. Hover over an icon to see its name, for example OVERVIEW or ISSUES.
- OPEN IN NEW TAB at the top of the drawer opens the record's full page in a new browser tab.
- Actions for the record sit in the drawer's … or ⋮ menu, or in buttons at the bottom of the drawer, such as IGNORE and ADD TO MY ASSETS for a discovered asset.
Select Several Records
Tick the checkboxes of the rows you want. A bar appears above the list with <n> selected and the actions, for example SCAN NOW and DELETE in the inventory, or CHANGE ALL STATUS in the issue list.
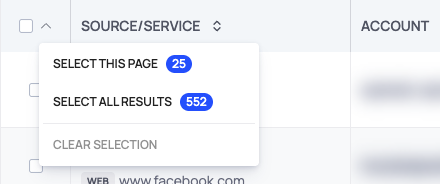
To widen the selection, open the menu of the checkbox in the table header:
- SELECT THIS PAGE selects every row on the page;
- SELECT ALL RESULTS, on the lists that offer it, selects every result;
- CLEAR SELECTION starts again.
SELECT THIS PAGE and SELECT ALL RESULTS show how many rows they select.
Choose the action in the bar.
Warning
SELECT ALL RESULTS selects every result, on every page, not only the rows you can see. The action you choose next applies to all of them. Use it only on lists whose page in this guide describes it, and check your filters first. Everywhere else, tick the rows or use SELECT THIS PAGE.
Export a List
- Filter the list if you want only part of it.
- Select EXPORT. The DOWNLOAD window opens: "Choose the records, format, and level of detail for your export."
- Choose what you want:
- RECORDS: ALL for every record in the list, without your filters, or FILTERED for the records that match your filters. FILTERED is offered when filters are applied.
- FILE FORMAT: CSV or JSON. JSON is selected at first.
- EXPORT SCOPE: DEFAULT, BASIC or EXTENDED, on the lists that offer it.
- Select DOWNLOAD. On Cyber Threat Intelligence (CTI) lists the button is EXPORT.
Not every list offers every choice. Vulnerability Search, for example, asks only for the FILE FORMAT. On a few lists, EXPORT is shown but cannot be used.
Compare Historical Records
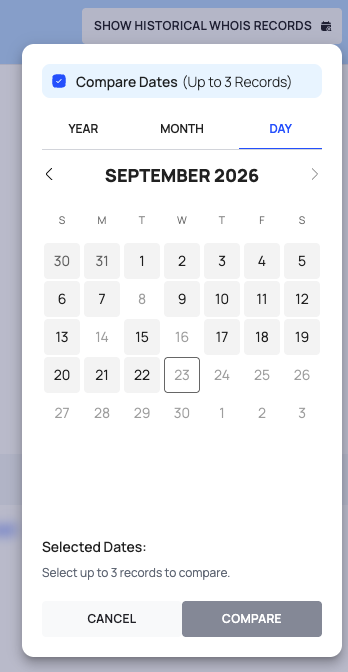
On an asset's full page, the ASSET INFO tab has buttons such as SHOW HISTORICAL WHOIS RECORDS and SHOW HISTORICAL DNS RECORDS. For open ports, the history button is an icon. Each opens a date picker with YEAR, MONTH and DAY.
- To see one snapshot, choose its date and select CONFIRM.
- To compare, tick Compare Dates (Up to 3 Records), choose up to three dates and select COMPARE.
Work With Page Tabs
Domain Search, Vulnerability Search, Instant Lookup and Dark Web Search work in page tabs, like a browser. Each search or lookup can have its own tab.
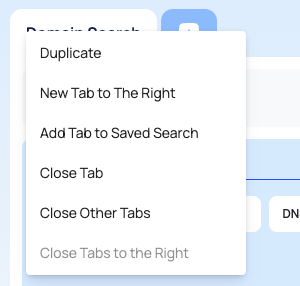
Right-click a tab for Duplicate, New Tab to The Right, Close Tab, Close Other Tabs and Close Tabs to the Right. The same menu lists Add Tab to Saved Search, which is not available. The tab list menu has a Search tabs box.
Your tabs are kept in this browser, for your user, so they are still there after a reload. They do not appear in another browser or on another computer. Because a tab keeps its content, check the target in a lookup tab before you run it again.
Good to Know
- No saved searches. SAVE THIS SEARCH, the SAVED SEARCH tab and Add Tab to Saved Search appear on some pages, but you cannot save a search with them.
- Changes take a few seconds. After an action such as a state change or a removal, the list refreshes after about 6 seconds.
- Same model as the API. The Must, Must Not and Should rules work like the
must,must_notandshouldparts of an API search request.
Do This With the API
- Search & filters: the filter model, the operators and bulk actions.
- Pagination: paging through results.
- Exports work the same way through the API, for example Asset Export.